Ever since I converted my hobby to a business, I've really struggled to make time to create things for me, that I never intend to sell, just for fun and to learn. There's a long list of things I'd like to make when I have time. It's a constant struggle and I've been known to sink into a funk of depression and jealousy when I see others managing to do it. Oh, you just whipped up a dress before work? How nice. I'll just be over here sewing another apron.
I don't know if it was a reward for surviving the One of a Kind Show or just that I had enough stock after the show to erase the guilt, but I finally did it -- I started a quilt! Sewing a quilt has been on new year's resolutions lists many times over, so I'm pretty proud that I finally jumped in. Besides time, I also place a lot of blame for my procrastination on intimidation. There are a lot of steps to making a quilt, a lot of steps that I knew absolutely nothing about. Luckily, there are as many quilting tutorials on the internet as there are quilts in the world, and after reading Amy's "
Beginner Blogging Series" and watching the "
Make A Baby Quilt" series of videos by the Missouri Quilting Company, I felt confident and ready to begin. If you're new to quilting, I wholeheartedly recommend these two resources. I returned to them many times throughout the entire process.
Here's how it all went down, step by step.
Step 1: Organize your scraps. Oof. Probably the most daunting step for me. There was much internet research involved even at this stage. I knew I needed to sort according to size and colour, but having never sewn a quilt before, I had no idea what sizes were needed. So I just started sorting through all of it, putting pieces in rough size piles: strips, triangles, squares, and small "weird" pieces. After all that, I had a good idea of common sizes and went through them all again, making more definitive piles: 2-3" strips, extra long and wide strips, 5" or larger squares, pieces smaller than 5", and "armpit" triangles. Anything smaller than a 2" strip or too small to make a hexagon was thrown away. Then I sorted each group according to colour and packed them away in clear Rubbermaid bins. Six bins, to be exact. I'm still considering putting some of these scraps up for sale. Would that interest anyone?

Step 2: Choose your quilt fabrics. Since baby boys are nearly epidemic in my circle of friends, I decided to make this baby quilt for a wee gent. This is the point when I realized I have way too many floral prints. But with that many scraps, there was no way I was buying anything new -- large florals would have to do. And after a brief social media poll, I settled on the green, blue, yellow combination.
Step 3: Cut your quilt pieces. I decided to go easy on myself for once and chose a very simple quilt top design for my first attempt: 49 6" squares. This is also what my two go-to resources made in their tutorials, so I stuck with that to eliminate any added confusion.
Step 4: Lay out your quilt pieces. This was probably my favourite part. It was fun to play with all the colour combinations. Mikey J even jumped in and moved a few squares around. Laying out this tiny quilt took up my entire bed. What do people do with larger quilts, I wonder?
Step 5: Sew together your quilt top. I already knew that stitching accuracy is very important in quilting, but I really had no idea exactly how much until I started sewing. If you look closely, many of my points don't line up. And there's no way to really fix that unless you take it all apart. So just don't look closely, alright? I'll do better next time.
Step 6: Make a quilt sandwich. I'm embarrassed at how many times I repeated this step. First I tried laying it out on the floor (a few times), with dull safety pins. This only resulted in a wrinkly back and heartbreaking holes in my fabric. Next I moved it to a cardboard sewing mat on top of my sewing table. I was sure to stretch and secure the bottom with paperclips this time, and I bought some handy dandy curved safety pins. Finally my sandwich was ready to eat, or rather, sew. I loved the way it looked all laid out like that though, so I left it for a few days to admire my work. Ha!
Step 7: Quilt. I debated machine- versus hand-quilting for too long, until I decided that I had spent far too long on this quilt already to start quilting it by hand. Following the advice of friends, I invested in a walking foot for my sewing machine for this step. Sewing through that many layers is tough and this gadget helps to feed them through evenly. Just like everything else in this process, it took me awhile to figure out how to use it properly, but once I sorted out that you have to sew slowly and trust that the foot will do its job without pulling or guiding too much with your hands, my quilt top was together in no time!
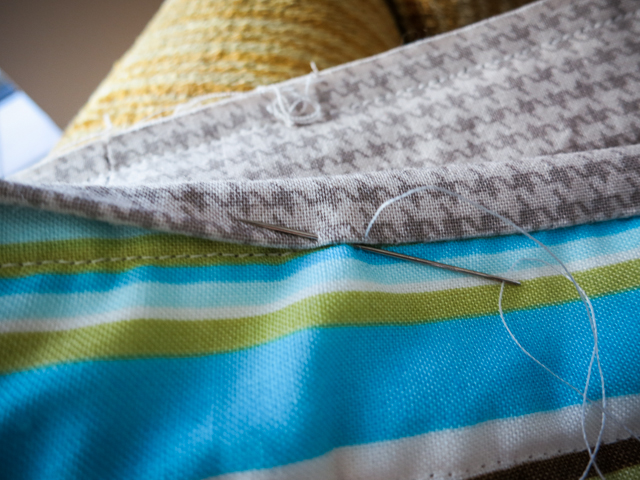
Step 8: Binding. Ok, I take back what I said about laying out the pieces as my favourite part. Hand-sewing the binding was the best! I just love hand-sewing. I took it with me from the TV to craft night and it was done in no time. Knowing that it was the very last step no doubt made it more fun and motivating as well.
Stay tuned... next week I'll reveal my finished quilt!